Stunning Applique Stitches
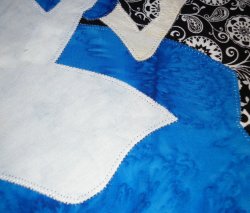
When selecting the most stunning applique stitches to use, you need to consider several things.
- Firstly what your machine is capable of doing well.
- Secondly, what effect are you wanting to achieve.
- Thirdly, what fabric you are using. I find 100% cotton fabrics fray easily, whereas batik fabrics fray a lot less.
- Fourthly, how are you going to apply your applique fabric design to your backing.
- And lastly what time do you have to complete the project.
What ever choice you make remember to practice first on a scrap of fabric. Some people recommend making a wee stitch sampler - like the one you get from the person who services your sewing machine. This is especially important with regard to thread tension. An adjustment to the top thread tension may be needed for some machines. Loosening the top tension will allow stitches to interlock on the wrong side of the fabric. Read the sewing machine manual (if you can find it, though most can be found online today) to determine the exact machine settings required for appliqué work.
Next time you are at a quilt class, quilt show or quilting shop, make a point of looking closely at what other people have used on their quilts and the effect this has added to the quilt.
Types of Applique Stitches
ZigZag Stitch:
Your sewing machine likely offers a couple of variants of this popular stitch. By ajusting the settings, you can achieve differing visual effects. Two iconic forms are the satin zigzag and the narrow zigzag.
Narrow (Fine) Zigzag:
This stitch gives a subtler finish compared to the satin variant. It provides an almost invisible lodging of the applique edges. Adjust the stitch length between .5 and 1.5, and width between .7 and 1.5. Experiment with these settings to find what suits your preference.
Satin Zigzag:
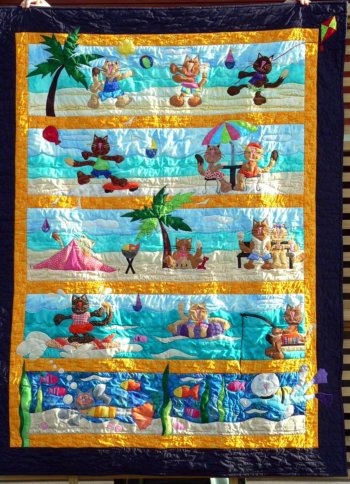
The dense and closely stitched zigzags which closely resemble a satin surface earn this stitch its name. It doesn't let the background fabric show between its stitches. You might want to set the stitch length within .2 – .5 range and the width within 2.0 – 4.0. The settings, however, can vary based on the design you are working with, so feel free to play around. Below is one of the first quilts I made and I used satin stitch. I remember having a few tension problems and poor consistency with my stitching which probably contributed to my not favouring this stitch.
Blanket Stitch:
A common and traditional method in applique stitching, the blanket stitch comprises a straight stitch along the applique's edge, followed by a perpendicular stitch into the shape. Ensure that your chosen blanket stitch forms a right angle between the straight stitch and the perpendicular stitch. Some machines might have an angled stitch setting instead, which isn't suitable here. You can begin with a 2.0 wide and 2.0 long stitch, making alterations as necessary to create smaller, blending stitches or larger, pronounced stitches. This is my preferred stitch to use as shown in the photo below.

Straight Stitch:
As straightforward as its name implies, the straight stitch is simple but effective. This stitch is often used in wall hangings. McKenna Ryan uses straight stitch to complete her applique quilts and offers a quick tutorial showing how she does this.
Additional Stitches:
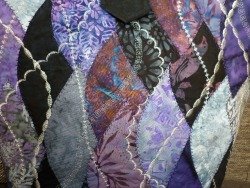
Create room in your stitch sampler to experiment with other stitch types and their settings. Consider testing the blind hem stitch for invisible machine applique and some decorative stitches, like a scalloped satin stitch for potential applique uses. Below is a bag I made using a range of decorative stitches that my machine offered.
What you choose to use is entirely up to you and your machine.
Size of Applique Stitches
When you are selecting your stitch size you need to practice it on a
scrap of fabric first. The theory is the smaller the design the smaller
the stitch used. But if you always like to use the same size stitch on
all your projects then do that. Some of the older sewing machines only
have straight stitch and zigzag stitch options with a limited stitch
size adjustment and that also is fine.
Thread Type
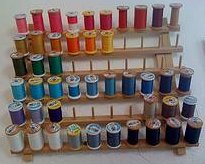
Photo courtesy of Gina Pina
Another choice you need to consider is your thread choice. Until recently I had always changed my threads to match the fabric I was sewing. This I feel adds depth to the design. I would recommend using a special thread for this that you can purchase in most sewing stores. Remember to always use a thinner thread in your bobbin.
The next choice you have, is to use invisible thread as your top thread. The benefit of doing this is that you don't need to be constantly re-threading your sewing machine.
The other choice you have, is to use black thread as your top thread. You would choose to do this if you were wanting a bold, contrasting effect. Again the benefit of doing this is that you don't need to be constantly re-threading your sewing machine.This is not my preferred choice as I love to match my colors. I'm currently making a Dr Seuss applique quilt where I am using black as my applique thread as this replicates the drawings in the books.
When choosing thread type you also need to select cotton, polyester or another type of thread on the market. I almost always choose polyester as it is stronger and less prone to weakening over time especially if your applique stitches are going to be exposed to direct sunlight.
Great! With your stitch style chosen you have just one lesson to complete. When sewing your applique design on it is imperative to be able to see where your machine needle is going, especially when sewing around corners! Using an open toed foot makes this easy to do.
In conclusion, while there is a diverse range of stitches for applique, finding the right fit for your project requires some playful exploration. Use this guide as a foundation for your stitching endeavors, leading you toward an applique stitch best suited for your unique crafting style.
My Amazon ads are my affiliate links. Thank you.

New! Comments
Have your say about what you just read! Leave me a comment in the box below.