- Home
- Online Patterns
- Paper Piecing
Free Paper Piecing Quilt Patterns
Free paper piecing quilt patterns can be a challenge but learning the correct art of paper piecing overcomes this. It is a technique that is also known as foundation piecing. A few of my friends and I tried this some time ago and most of us decided it was in the too frustrating basket! I tried it again later and the results were much better. It is a technique that requires practice, practice and more practice.
Once mastered the results are very rewarding especially when piecing small pieces of fabric as the accuracy you achieve is fantastic. It is this accuracy that keeps quilters using this technique.
Though the term has paper in it, it is not always a must to use. Computer paper is not the best option even though most of us have easy access to it. A finer paper is preferable like Strathmore Translucent Vellum pack of 20Some quilters use muslin to trace their design onto and leave it in. This does create a slightly heavier top.
If you don't like paper piecing because of the required paper removal at the end then here is a great alternative by Wendy Knitch.
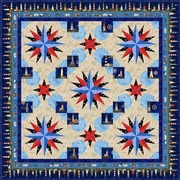
|
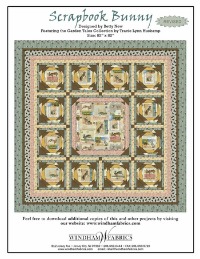
|
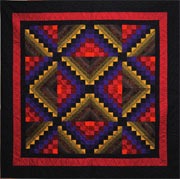
|
| Pattern courtesy of RJR Fabrics. Sailing By The Stars Quilt Pattern. | Pattern courtesy of Windham Fabrics. Scrapbook Bunny Quilt Pattern. | Pattern courtesy of RJR Fabrics. Sedona Quilt Pattern. |
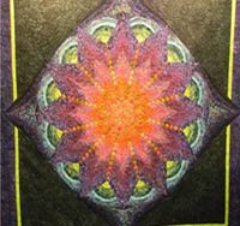
|
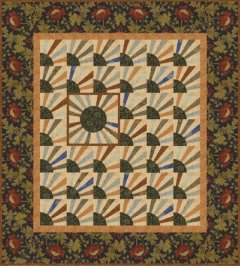
|
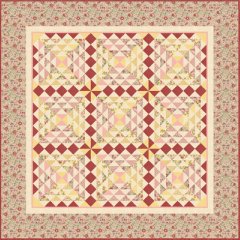
|
| Pattern courtesy of Anthology Fabrics. Florigia Quilt Pattern. | Pattern courtesy of Moda. Morris and Company Quilt Pattern. | Pattern courtesy of Moda. Pom Pom de Paris Quilt Pattern. |
Visit here for more Free Paper Piecing Patterns. They are labeled Foundation Piecing Patterns and are scattered throughout each listed block category.
Below is a very good paper piecing tutorial by Karen Johnson of Connecting Threads.
This helps her trim accurately each piece of fabric after sewn. Though you can use scissors to trim your fabric this ruler makes paper piecing much easier and more accurate.
Below I have supplied a simple tutorial for you to practice paper piecing. To follow this you will need the following
* Paper piecing pattern
* Fabrics
* Scissors or Rotary Cutter and Mat
* Add a quarter ruler
* An Iron
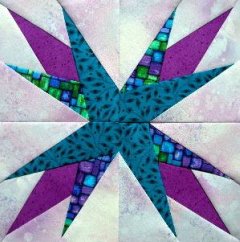
Step 1 First print off a copy of the Practice Block. Two have been supplied below - the introduction pattern and the beginner block patter - or choose your own ensuring it has 1/4" seam allowances. You can either trace (accurately!) this block onto thin paper, or photocopy it making several copies to practice on.
Step 2 Set your sewing machine stitch length to a small stitch...about 12-18 per inch, and then change the needle to a size 90/14. This will aid in the perforation (and later removal) of the paper foundation. The side with the numbers and square will be the BACK side of your block!
Step 3 Cut a piece of fabric large enough to cover the area labeled "1" with AT LEAST 1/4" extra all around. Center this fabric, right side up, on the RIGHT (unprinted) side of the foundation paper. Flip the paper over and hold up to a light to see that you have it covering the "1" space, plus at least 1/4" beyond on all sides. Pin in place... I liked Karen's tip that the wrong side of the fabric in placed on the wrong side of the paper pattern.
Step 4 Cut a piece of fabric large enough to cover the "2" space with AT LEAST 1/4" extra all around. Place this right sides together with Fabric 1 . Hold up to the light to see that it is going to cover the "2" space with 1/4" extra on all sides. Pin this piece in place.
Step 5 Flip the whole thing over. Now stitch on the line between section 1 and section 2. Take a short back-stitch at the beginning and end of this row of stitching. Trim the seam allowances back to just 1/4", being careful not to cut the paper off and flip it all back over.
Step 6 Gently press out the "2" unit using a dry iron.
Step 7 Repeat this process following the numbering on the paper pattern.
 |
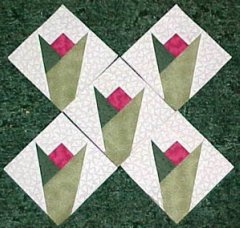 |
Carol Doak is an author and quilt teacher with a special interest in teaching paper piecing and making available some free paper piecing quilt patterns to help you learn this technique. She has had several articles published in the Quilter's Newsletter Magazine showing how you can convert traditional quilt patterns to paper-pieced patterns and also how to design your own paper-pieced blocks. Above I have show cased two of her free paper piecing quilt patterns on her website for you to use. You will find more free paper piecing quilt patterns, books on paper piecing and the two above mentioned articles on her Website.
- Home
- Online Patterns
- Paper Piecing




New! Comments
Have your say about what you just read! Leave me a comment in the box below.