Steam-A-Seam
How To Use A Fusible Web

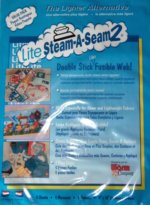
Steam-a-seam is a popular choice among a variety of fusible webs available in the craft market today. For those unfamiliar with this product, fusible web is a heat-sensitive adhesive that melts when it's heated, effectively allowing two pieces of fabric to be bonded together. Steam-a-seam can be purchased in either pre-packaged form, as depicted in the image above, or by the yard. The packaged form and the yard variety both come with detailed instructions for usage. If you find that your product does not have instructions, it's likely that you've been given a different brand of fusible web. You may prefer to use a different brand of fusible web to myself and that is fine - use what you like and prefer, to create fabulous appliqué.
One of the critical features that distinguishes this particular brand, and lends it a competitive ease-of-use, is its ability to hold in place all your design pieces while you're positioning them for your appliqué work. Anyone who's worked with appliqué designs before will tell you the frustration that happens when a sudden breeze, or even a tiny nudge, potentially moves the placement of your (usually multiple and small) appliqué pieces on your work surface or worse onto the floor!
More often than not, I find myself returning to Steam-a-seam, even after trying out different brands usually due to the unavailability of my preferred fusible web, testifying to the superior handling and user experience that this particular brand offers me.
The ideal time to use a fusible web is during the drafting or tracing stage of your pattern. A typical fusible web comprises of three layers:
1. A protective paper layer.
2. The adhesive or sticky web in the middle.
3. Another paper layer.
It's worth noting that one of these paper layers has been specially designed to be easily peelable. Hence, ensure that you trace your design onto the paper linked more firmly with the sticky web. If you are using the original steam-a-seam product, then the web has sticky properties on only one side. Therefore, please double-check that you have the glue-side (sticky) facing upwards. Always use a hard, flat surface when working with fusible web to ensure the best results possible. When you start to trace your pattern onto the fusible web, you should have all three layers of the fusible web assembled together i.e. both papers are still attached.
My steam-a-seam method for appliqué
Here's my easy step-by-step process to guide you in using your fusible web for appliqué:
1. Select your desired appliqué design and, using a sharp pencil, trace it onto the paper liner. Subsequently, peel away the other (the one with no drawing on it) paper liner.
2. Proceed to stick it onto the wrong side of your fabric medium.
3. Simultaneously cut both the web, fabric and paper together along the previously drawn cutting lines.
4. Now, peel off the remaining paper and carefully arrange your appliqué pieces onto your chosen backing.
5. For the final step, press (not ironing like you would your clothing) your iron onto the arrangement for 10-20 seconds, using a steam-function if the manufacturers instructions tell you to use steam, on your iron while doing so to ensure maximum adhesion.
Done! You are now ready to assemble your appliqué. To assist you in selecting the best appliqué stitches, please refer to the following lesson.
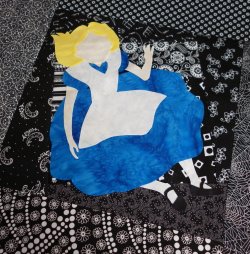
For a more detailed appliqué tutorial using many pieces to create your design visit my Alice Quilt and scroll to the bottom of the page where I give step by step instructions and I have also made a video showing how I do this using an appliqué pressing sheet. These sheets are transparent allowing you to have your pattern underneath them for accurate piece placement.

Some Additional Fusible Web Tips:
- To optimise fabric usage, trace pattern pieces that use the same fabric together.
- For larger pattern pieces, you can iron the Steam-a-seam only on the edge of the fabric, enabling you to cut away the center for utilization in smaller pieces. This technique not only aids in economy but also in creating a softer effect to the quilt.
- Crucially, remember to reverse your pattern before you even begin if the orientation of the appliqué piece is vital and is required. You can employ a window (during daylight), a lightbox, or a photocopier to help with this task, depending on your accessibility to these items. I usually default to using the window due to it size, accessibility and ease of use.
- Invest in an appliqué pressing sheet if you are making appliqué designs with multiple pieces to them.
Congratulations you are now ready to assemble your appliqué! To help you select the best applique stitches move onto the next lesson.
My Amazon ads are my affiliate links. Thank you.


New! Comments
Have your say about what you just read! Leave me a comment in the box below.